

The order in which you take your tricks can be very important. Take this deal
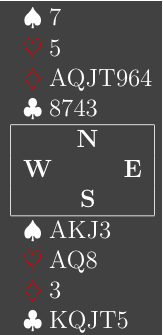
from yesterday’s club game. Matchpoints, you open 1♣, hear 1♥ on your left, partner shows diamonds and without further bidding from the opponents, you reach 6♣. The ♠10 is led for 7, 2 and J. Plan the play.
You have 2 possible lines of play. The first one is to ruff the 3 and the ♥Q8 in dummy. The problem with that line is that the opponents may have a spade ruff as well. For example, when west has a singleton spade or a doubleton with the club 9. The lead of the 10 suggests that is quite possible.
Slightly better is to set up the diamond suit but this requires careful play. In trick 2, play a diamond to the ♦A and ruff a diamond with the ♣10. Now play clubs from the top. There is nothing the opponents can do. Even if clubs break 3-1, the best the player with ♣A9x can do, is to duck the first one, win the second one and play a third round. However, because you ruffed the first club with the ♣10, north will win, you can ruff a diamond and return to dummy with a ruff to enjoy the long diamonds.
The full hand was this.
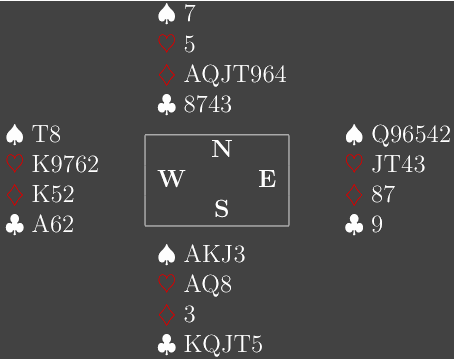
Note that you should ruff the first diamond with the ♣10, not the ♣5, as our
opponent discovered. Spade lead to the jack, diamond to the ace, diamond ruff with the ♣5 and clubs. West won the second one and returned a third round of clubs. Declarer was forced to win in the hand and now was an entry short to set up and enjoy the diamonds. He wasn’t alone though, the scoresheet shows 4 pairs going down in slam and 2 pairs making game.
Another one from the same game.
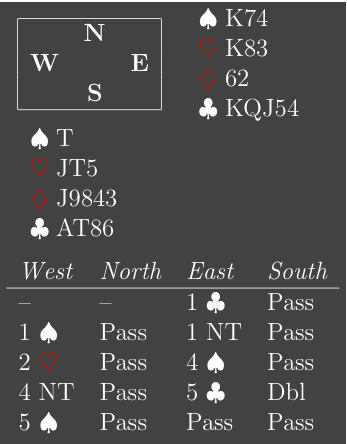
The auction is natural, with 3♥ forcing and 5♣ showing 1 or 4 keycards. Partner duly leads the ♣2 for the J, your ace and 9, now what?
Partner’s 2 (3rd and 5th) suggests that he has 3 small in the suit, declarer thus has a singleton. The auction suggests that declarer has 5♠ and 4 or 5♥, making his shape something like 5-5-2-1 or perhaps 5-4-3-1.
The auction also suggests that partner has an ace. Should we try cash it now? And if so, in which suit should we try to do this?
Yes, if that ace is the ♦A, this might happen. If you don’t lead a diamond, declarer will win the next trick in dummy and play 2 more clubs. Partner is forced to follow twice and declarer can pitch 2 diamonds. He still has a spade loser but that is all. If partner has the ace in another suit, it does not really matter what you lead next. Declarer will never be able to discard all his hearts and obviously the ♠A will always be a trick.
The full hand.
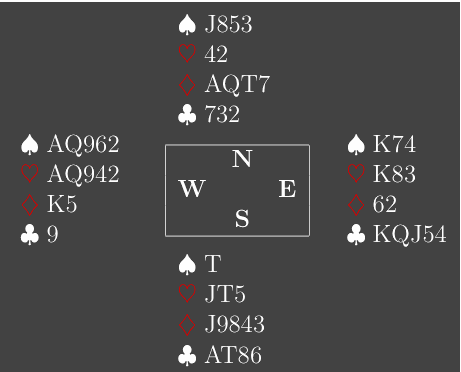
It looks quite easy when you think about all this, but this was missed at 5 out of 6 tables yesterday.